Proper Steps for Preparing Indoor Wooden Surfaces for Painting
When it comes to giving your indoor wooden surfaces a fresh coat of paint, preparation is key. Without the proper foundations, even the best paint can fail to adhere correctly, leading to a less than desirable finish. Whether your next project involves cabinets, trim, or furniture, the steps you take before painting will make all the difference.
In the following blog post, we’ll cover how to ensure your wooden surfaces are primed and ready for a flawless paint job.
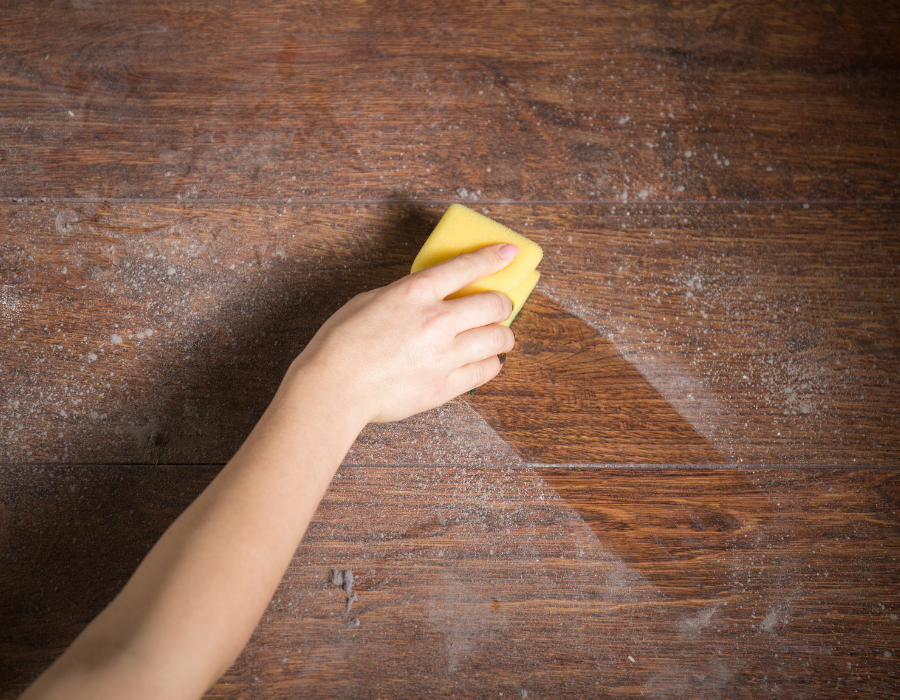
Step 1: Clean the surface
First, you’ll need to make sure that your timber surface is free from all particles and grease. Use a gentle but effective degreasing formula or a mixture of warm water and mild detergent to carefully wipe down the surface with a clean microfibre cloth. You can also use a special wood cleanser, just be sure to follow the directions on the label. For more stubborn stains, a soft scrub brush or sponge can help, but be careful not to cause any damage to the wood. Allow the newly-cleaned surface to dry completely before moving on to the next step.
Step 2: Repair imperfections
Inspect the wood for any nicks, scratches, or holes that may need repairing. Paint will only highlight these imperfections if they’re not fixed. Small imperfections can be filled with our Stainable Wood Filler. Make sure the filler is smooth and flush with the surface as it dries. Sanding the wood may also be necessary to achieve a perfectly even surface.
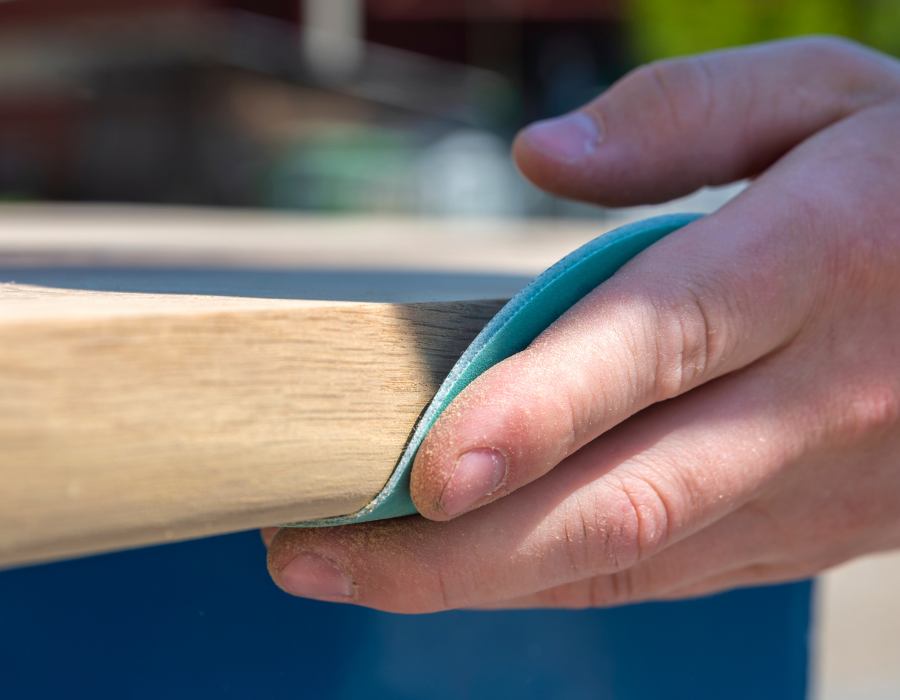
Step 3: Sand the surface
Sanding removes previous finishes while creating a texture that paint can better adhere to. Begin by sanding with a medium-grit paper to get rid of the larger bumps and old paint, and then move to a fine-grit paper for a smooth finish. Make sure you’re sanding in the direction of the wood grain to avoid scratiching the timber. When finished, wipe down the wood with a soft, damp rag to remove any dust.
Step 4: Prime
Priming your wood is very important, especially if you’re going to be changing the colour significantly. Primer will block stains, prevent wood tannins from bleeding through, and help create a uniform surface that will take the paint more evenly. There are plenty of specialty primers that are designed to penetrate timber and offer good foundation for your paint job. Follow the manufacturer’s instructions.

Step 5: Paint
Once your surface is ready (by following the steps above) it’s time to paint. When choosing a wooden paint, consider the durability and the finish of the paint, as areas with high foot traffic or frequent usage will need more resilient options, like semi-gloss or gloss finishes. The environment and exposure of the wood also play a crucial role; for instance, moisture-resistant paints are ideal for kitchens and bathrooms. Lastly, the colour choice is essential, not just for visual appeal but also for how it complements the wood’s natural grain and incorporates into your space. Sadolin Classic All Purpose Woodstain can be used on a wide variety of wooden surfaces, both interior and exterior. This stain absorbs deeply into the timber to provide exceptional protection against the elements.
Properly preparing your indoor wooden surfaces for painting is a process that needs patience and attention to detail. By following the above steps, you’ll guarantee a more durable and professional-looking paint finish that will enhance the beauty of your wooden features for years to come. For help with your next timber-related project and everything you need to prepare, call into your local Sadolin stockist.